In this lesson, you’ll create a scenario that automatically taps a specific image using Image Detection.
We’ll use a mini-game example to learn the basic operations of image-based detection.
By completing this lesson, you will learn:
✅ How to use the Image Detection step
📥 Download the prepared scenario
(optional – for reference or comparison)
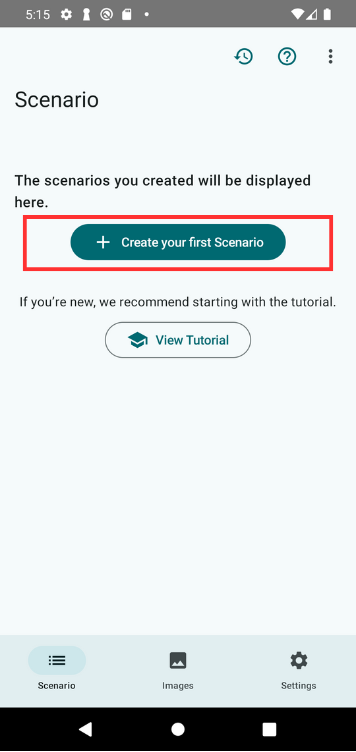
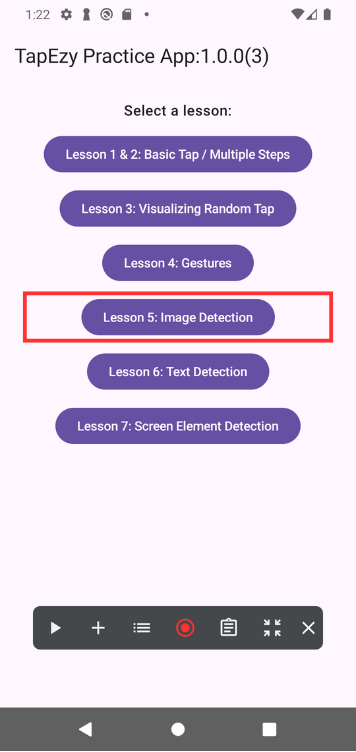
1. Create a New Scenario
Start TapEzy and create a new scenario.
If this is your first scenario, tap the “Create your first Scenario” button in the center of the screen.
If you already have one or more scenarios, tap the + button in the lower-right corner.
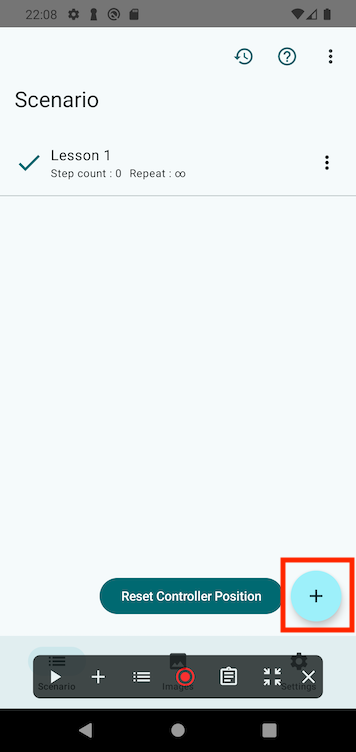
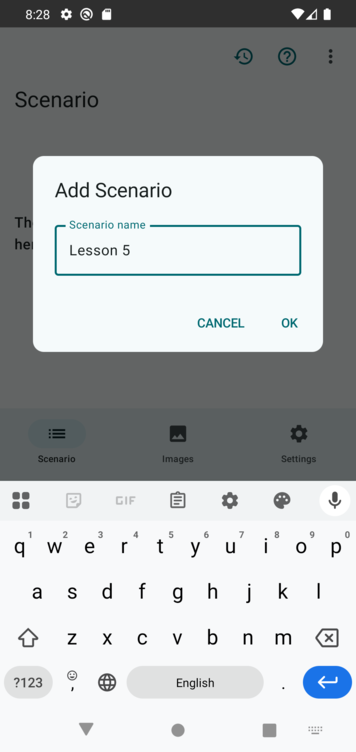
Give your scenario a name like “Lesson 5” and tap OK.
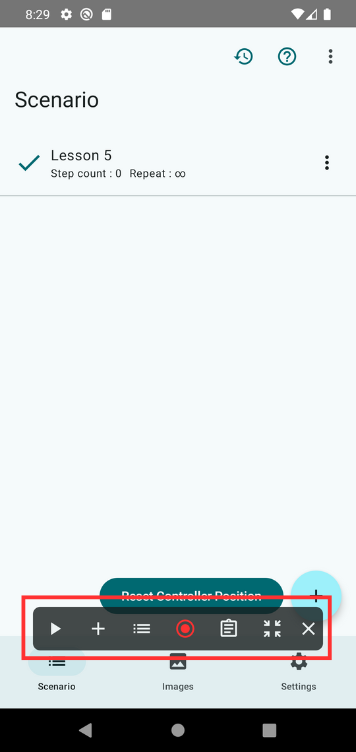
Once created, the Scenario Controller will appear at the bottom of the screen.
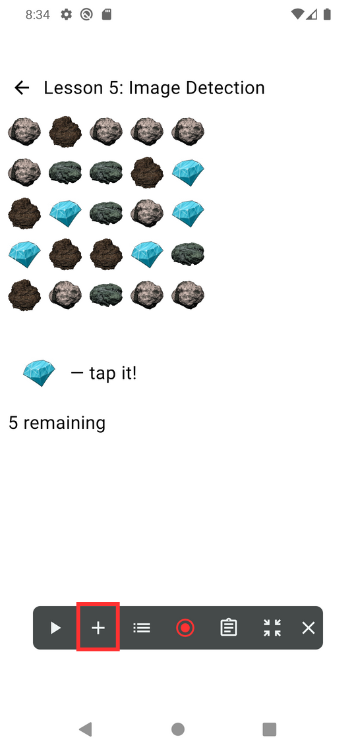
2. Open the Practice App
Open the TapEzy Practice App you installed during the setup.
From the home screen, tap “Lesson 5: Image Detection” to navigate to the lesson screen.
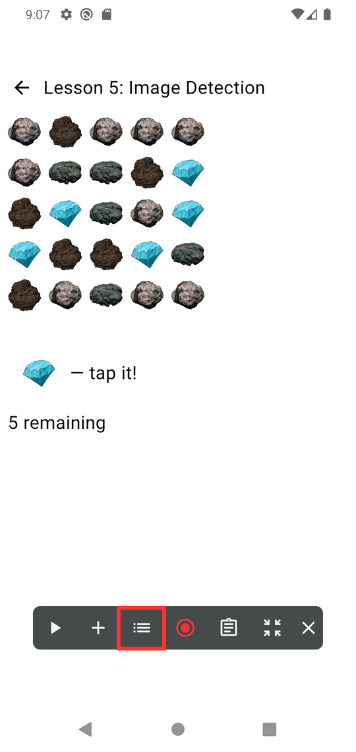
This screen shows a mini-game where gems and stones appear randomly. When you tap on a gem, it disappears.
The goal is to tap all the gems to clear the stage.
3. Add an Image Detection Step
Now let’s try clearing the game automatically using TapEzy.
In the Scenario Controller, tap the + button and choose “Image Detection”.
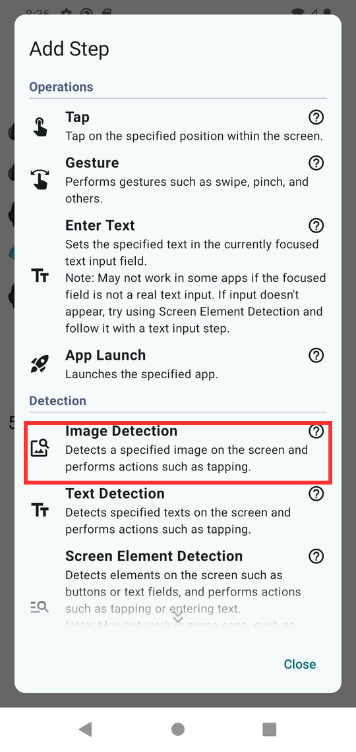
You’ll be prompted to specify an image.
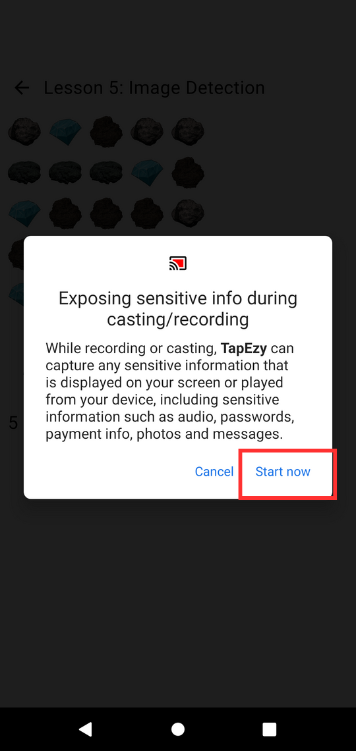
We want to use a gem from the current screen, so choose “Capture Screen”.
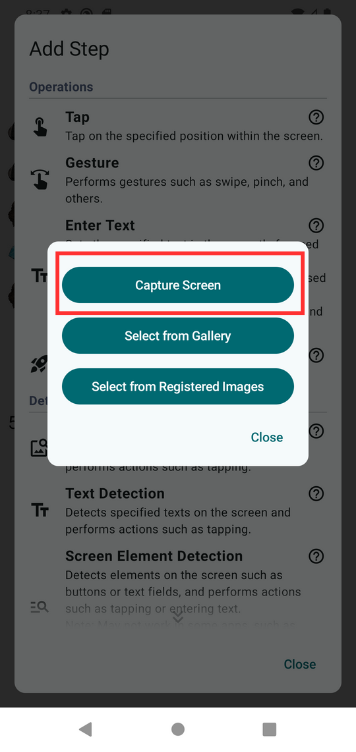
Android will ask for permission to record your screen.
Once you understand this, tap “Start now” (or similar) to proceed.
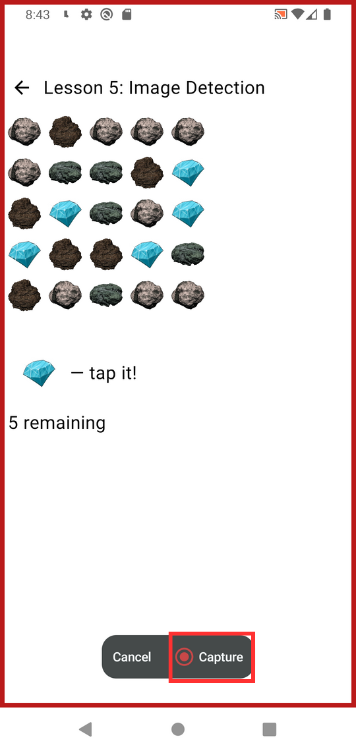
At the timing you want to capture, tap “Capture” at the bottom of the screen.
Since the screen is static, you can capture right away.
Tip: You can also operate the app while on this screen—for example, navigate to a different screen and then tap Capture to record a specific state.
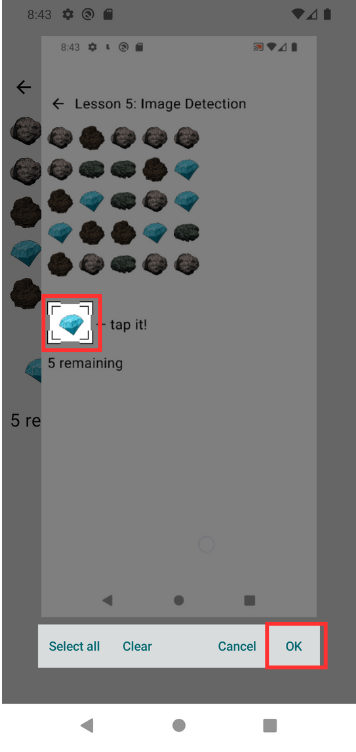
After capturing, you’ll be asked to select the target image area.
Drag a box around the gem image you want to use. Tap OK to confirm.
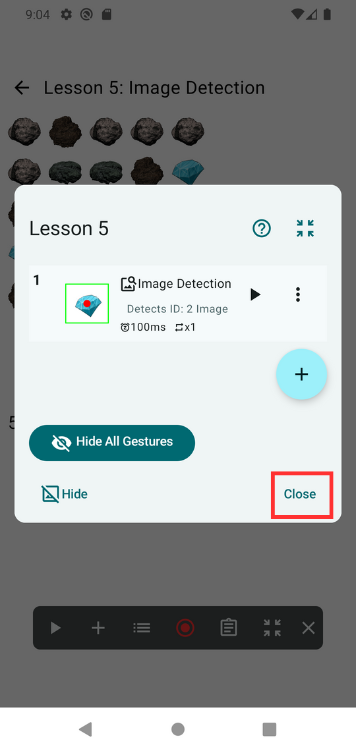
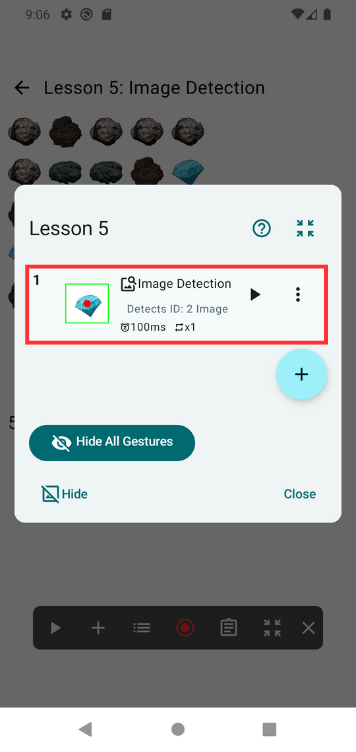
The step will be added and shown in the step list.
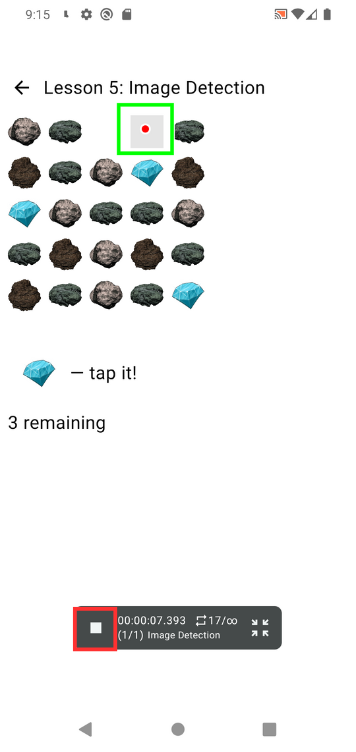
You should see a red dot indicating the center of the target image that will be tapped.
For detection-type steps such as image detection, the default behavior is to tap the detected element as soon as the step is added—this red dot indicates the tap point.
Tap Close to dismiss the step list.
4. Set the Detection Area
You can already run the scenario as-is, but if you don’t set a detection area, the app might tap unintended areas (such as the gem icon in the text “💎 — tap it!” above).
To avoid unintended taps, set a Detection Area to limit where the image search will occur.。
To do this:
- Tap the list button in the Scenario Controller to reopen the step list.
- Tap the image detection step you just added.
- Look for the Detection Area setting, which is probably set to “Fullscreen.”
- Tap the ✏️ icon next to it.
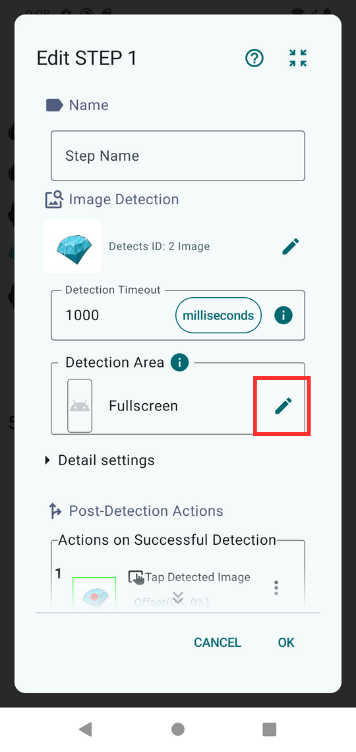
- Drag to define the region where gems and stones appear.
- Tap OK to confirm.
5. Play the Scenario
Now let’s run the scenario to test it.
To play the scenario, tap the ▶ button in the Scenario Controller.
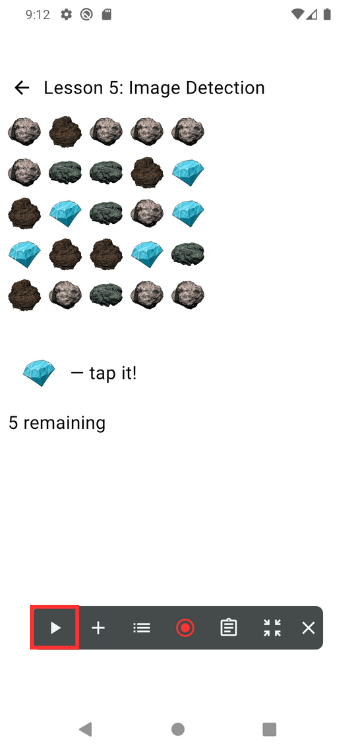
Android will again show a system dialog asking for permission to capture the screen. Tap “Start now” to proceed.
The scenario should now automatically tap the gems, clearing the mini-game.
To stop playback, tap the ■ button.
Summary
In this lesson, you learned how to:
- Detect gem images and tap them automatically
- Add and configure an Image Detection step
- Use detection areas to prevent incorrect taps and reduce processing load
After playback, you should see that only gems inside the specified area were tapped correctly.
📚For more details: