In this lesson, you’ll create a scenario that simulates form input using the UI Element Detection feature.
You will learn:
✅ How to use Screen Element Detection steps
✅ How to enter text into detected Screen elements
📥 Download the prepared scenario
(optional – for reference or comparison)
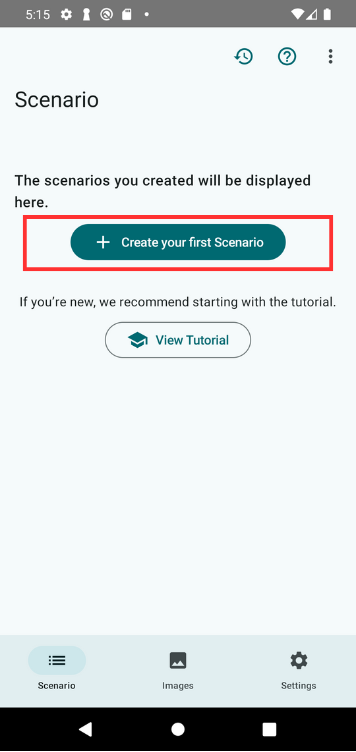
1. Create a New Scenario
Start TapEzy and create a new scenario.
If this is your first scenario, tap the “Create your first Scenario” button in the center of the screen.
If you already have one or more scenarios, tap the + button in the lower-right corner.
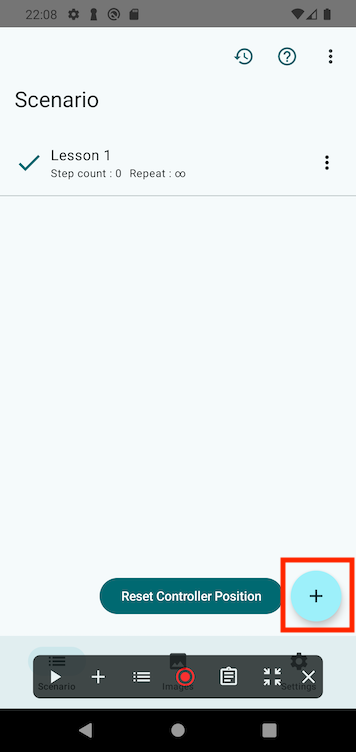
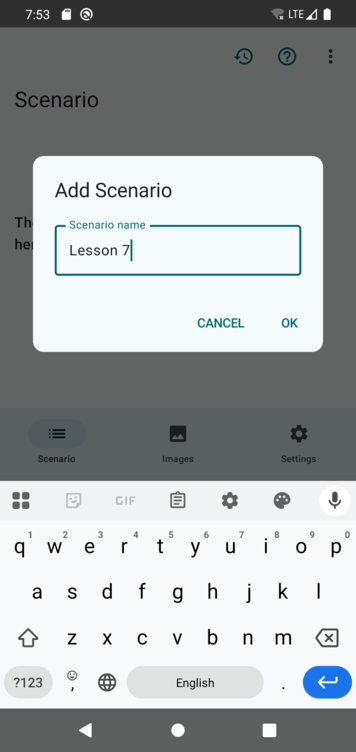
Give your scenario a name like “Lesson 7” and tap OK.
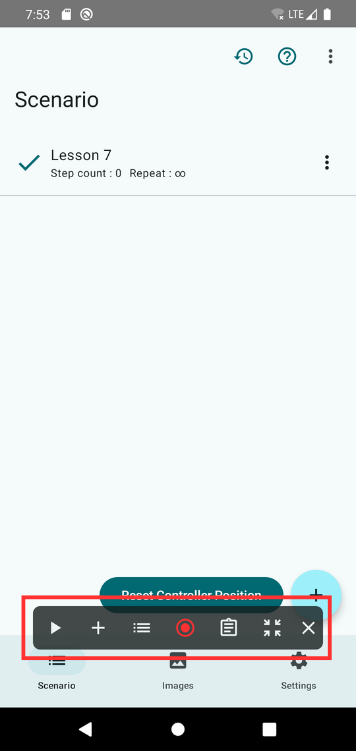
Once created, the Scenario Controller will appear at the bottom of the screen.
2. Launch the Practice App
Open the practice app for TapEzy that you downloaded earlier.
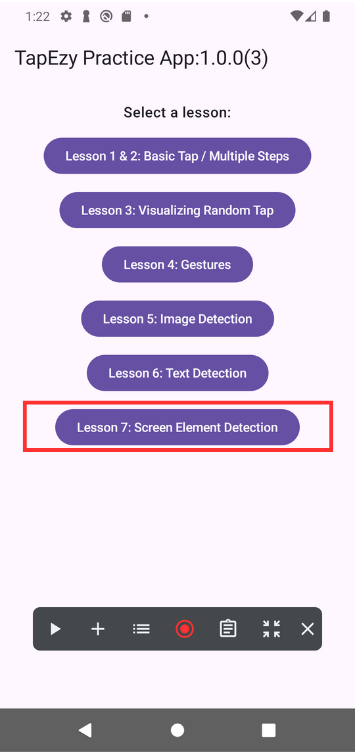
On the home screen, tap Lesson 7: UI Element Detection.
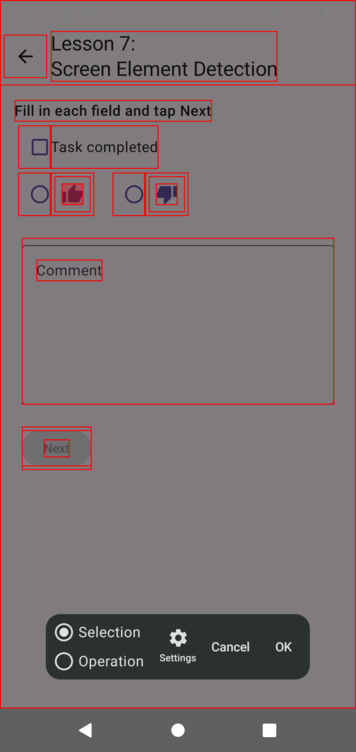
You will see a simulated form with checkboxes, radio buttons, and text fields.
Try interacting with the form by tapping or entering text to see how it responds.
3. Tap the Checkbox with TapEzy
Let’s start filling out the form using TapEzy.
We’ll first add a step to check the checkbox labeled Task completed.
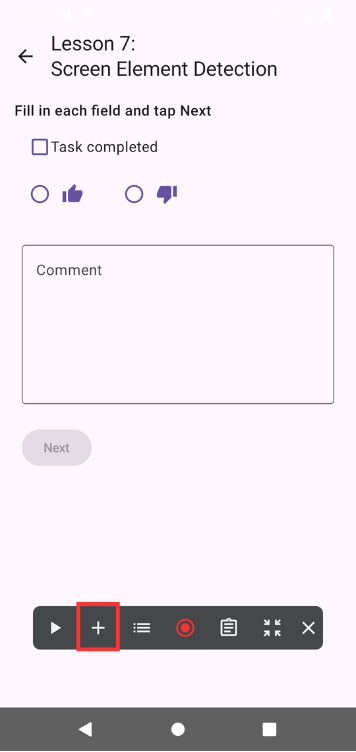
Tap the + button in the Scenario Controller and select Screen Element Detection.
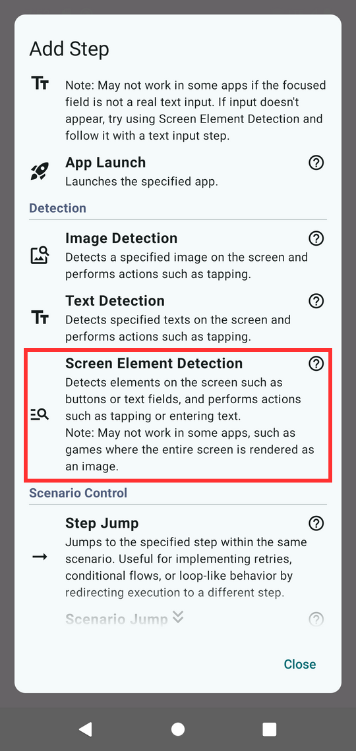
Once selected, the detection screen will appear.
In this step, we’ll try checking the checkbox labeled “Task completed”.
This can be done by tapping on the text label “Task completed”, which is linked to the checkbox itself.
First, open the Detection Settings screen and enable the option “Restrict to tappable elements”.
By turning this on, only the elements that can be tapped will be highlighted with a red border, making it easier to select the correct element on the screen.
Then, tap the red box surrounding the text Task completed. The selected area will turn red. Tap OK to confirm.
A new detection step is added. In the step list, a red dot appears at the center of the detected element, indicating that a tap will be executed at that location when the step runs.
Tap the newly added step to view its settings.

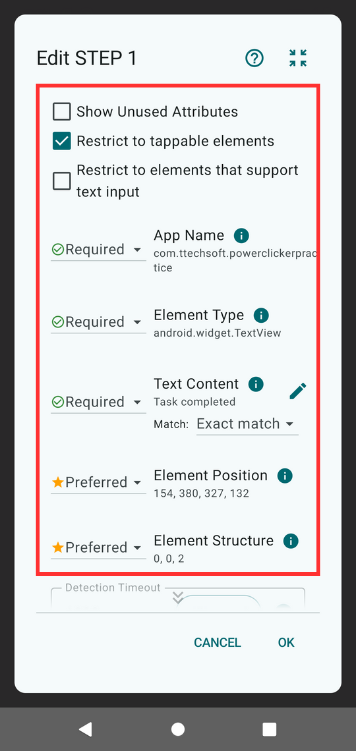
The Step Edit screen will open, allowing you to review the current detection settings.
First, you’ll see that the option “Restrict to tappable elements” is enabled.
With this setting on, elements that are not tappable will be excluded from the detection candidates.
Next, let’s look at the items marked as Required:
- App Name is a condition used to identify which app must be currently displayed. In this case, it is set to the TapEzy practice app.
- Element Type defines what kind of UI element to detect. Here, it is set to TextView, meaning that the element must be a non-editable text label.
- Text Content refers to the exact text that must appear on the screen. It must be an exact match with “Task completed”.
If an element on the screen satisfies all of these required conditions, it will be successfully detected.
However, if multiple elements satisfy the required conditions, the system will use the Preferred conditions to choose the best match.
In this way, UI Element Detection determines whether detection succeeds based on a combination of conditions.
Try adding detection steps for other UI elements to deepen your understanding of how it works.
4. Select a Radio Button
Next, let’s add a step to select a radio button.
Since the radio button doesn’t contain visible text, we’ll detect it using its content description, which is metadata used in accessibility services.
Steps:
- Tap + in the Scenario Controller
- Select Screen Element Detection
- On the detection screen, tap the 👍 icon (smallest red box)
- Tap OK
Then, open the step editor to check the detection conditions.

You’ll see:
- App name and element type
- Description is set to good, and marked as a required match
5. Input Text in a Form Field
Now let’s add a step to enter text into the Comment input field.
Steps:
- Tap + in the Scenario Controller
- Select UI Element Detection
- Tap Detection Settings at the bottom
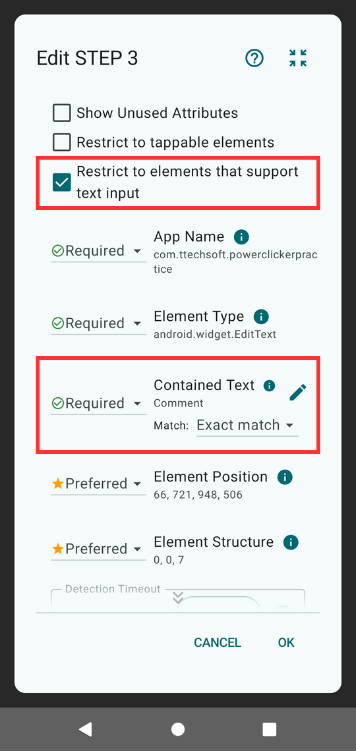
- Enable Restrict to elements that support text input
- Close settings
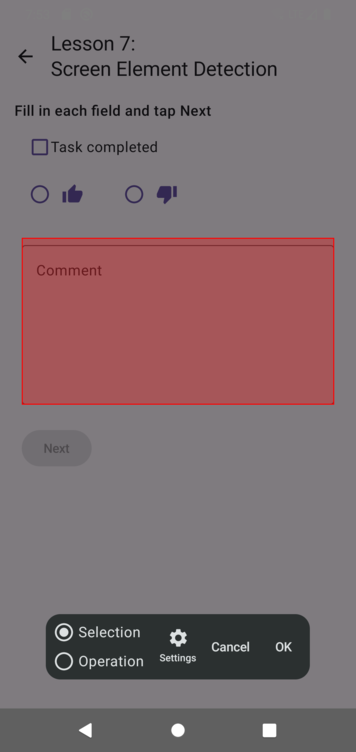
- Tap the red box labeled Comment
- Tap OK
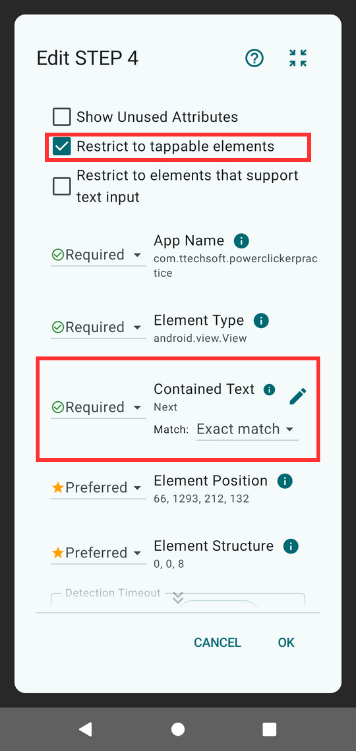
Open the step editor to review the conditions:
- Text-input-only filter is enabled
- Required fields: app name, element type, and contained text
In this case, the word Comment is hint text within the form’s container, not part of the text input itself.
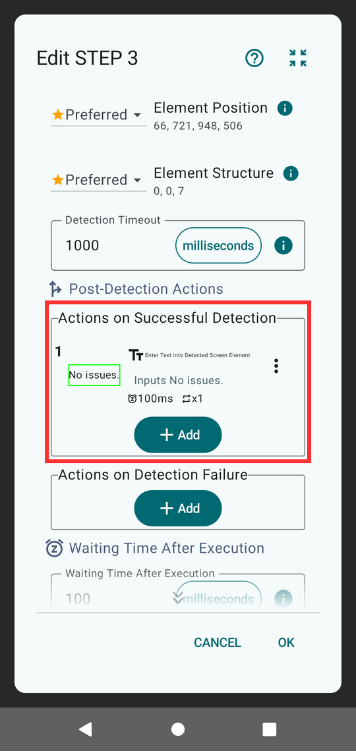
Now scroll down to Detection Success Actions.
The default action is Tap Detected Screen Element, which is fine for checkboxes and radio buttons but not for text input. So:
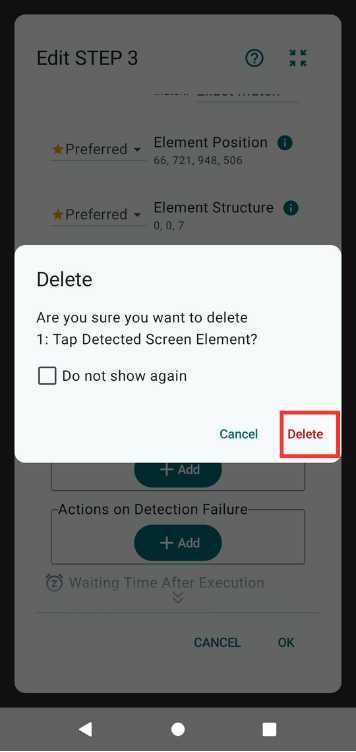
1. Tap the … next to “Tap on detected UI element” and select Delete
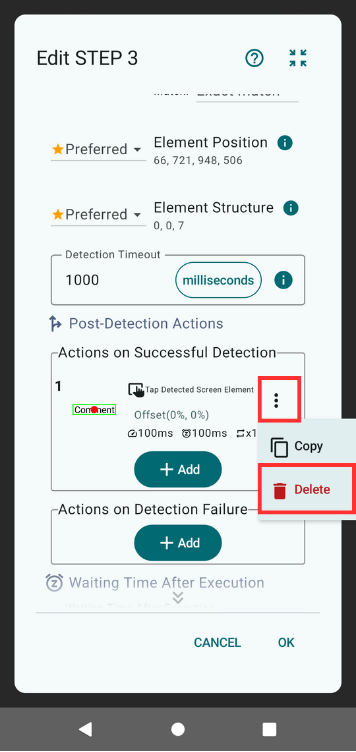
2. Confirm deletion in the dialog
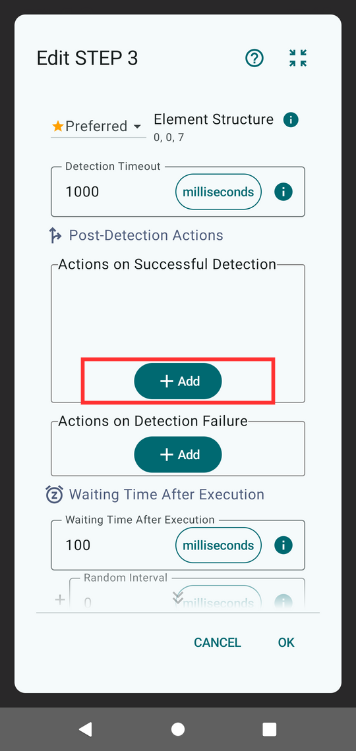
3. Tap Add
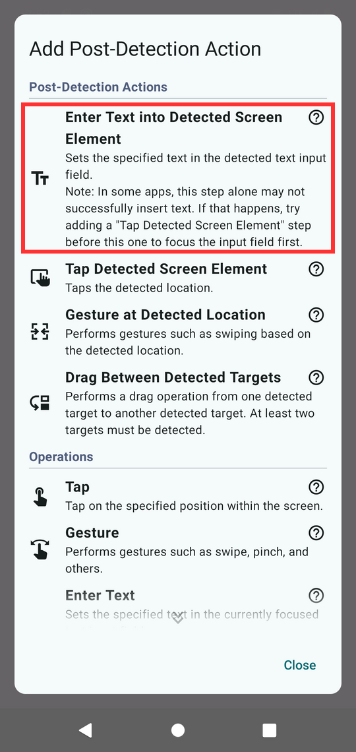
4. From the dialog, choose Enter Text into Detected Screen Element
5. Enter the text (e.g., “No issues”) and tap OK
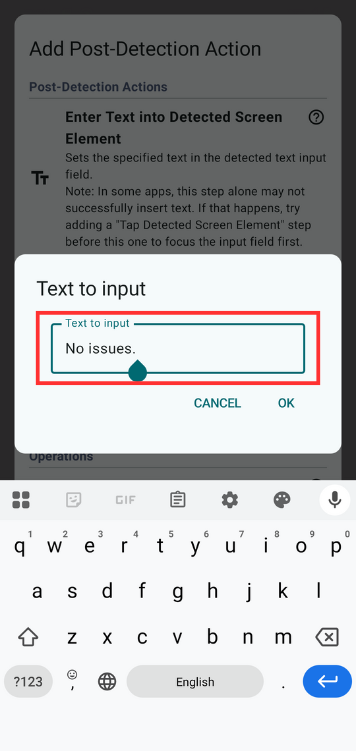
Now the detection step will enter the text “No issues” into the comment field.
6. Tap the “Next” Button
Finally, let’s add a step to tap the Next button after filling in the form.
Steps:
- Tap +
- Select UI Element Detection
- Tap Detection Settings
- Enable Restrict to tappable elements
- Close settings
- Tap the red box labeled Next
- Tap OK

In the step editor, check that:
- Tappable elements only is enabled
- Contained text is set to Next as a required match
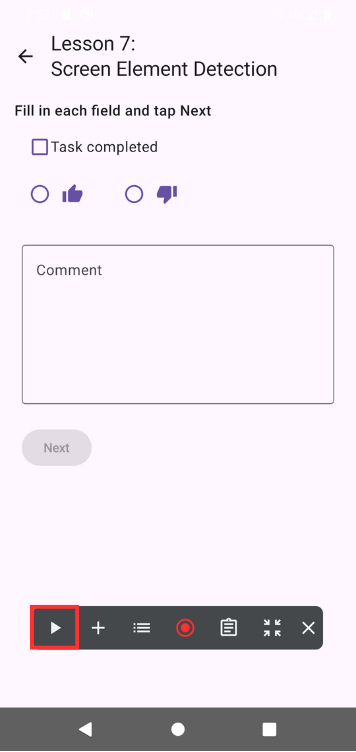
7. Run the Scenario
Your scenario is now complete. Tap the ▶ button in the Scenario Controller to run it.
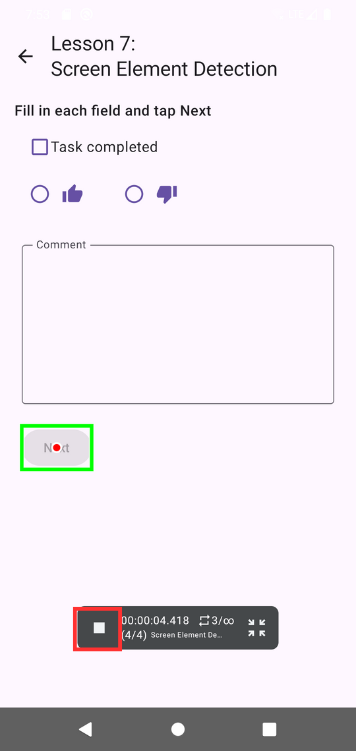
You should see the form being filled in automatically. Tap ■ to stop the playback if needed.
Summary
In this lesson, you learned:
- How to detect UI elements and tap them automatically
- How to use text content, content descriptions, and contained text as detection conditions
- How to detect form fields and enter text into them
You can now create scenarios that automatically interact with form-like UIs using TapEzy.
📚For more details: